
Page Menu
We’ve all been there: one minute you’re having fun, maybe cutting vegetables or playing catch with the dog, and the next minute you have a small cut or scrape. It’s as if life suddenly chose to give you a small surprise! But don’t worry; taking care of these annoying injuries at home is easier than you would imagine. Let’s talk about how to deal with cuts and scratches like an expert!
Understanding Cuts and Scrapes

First things first, let’s be sure we know what we’re talking about. A cut usually goes deeper and breaks through the skin layers, while a scrape (or abrasion) simply affects the top layer of skin. Think of it this way: if you take a piece of cake out of your birthday cake, it’s messy, but if you accidently smear frosting on the tablecloth, it’s even messier!
It’s interesting that you can treat most little wounds and scrapes at home without having to go to the doctor. This is great news because let’s face it: who wants to sit in a waiting area browsing through old magazines when they might be relaxing on their couch? The most important thing is to know how to clean them right and keep them safe while they heal. So get your first-aid kit ready; we’re about to go on an adventure on how to deal with injuries!
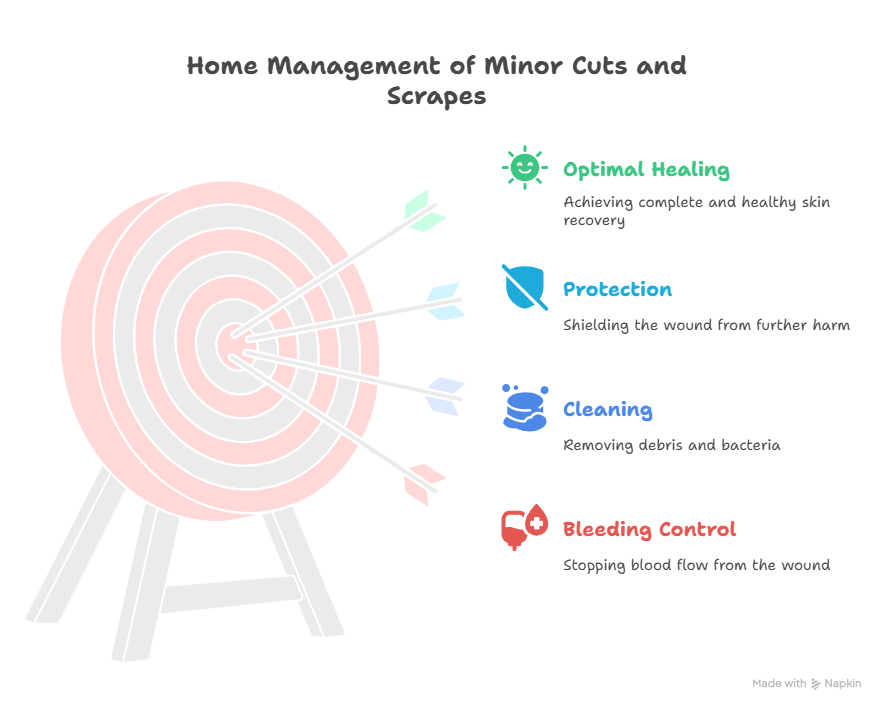
Let’s talk about what a “minor” cut or scratch is before we go into anything further. These are usually injuries that don’t cause a lot of bleeding or major wounds. You might think of them as the minor things that happen in life instead of real emergencies. You could get one while cutting up veggies for dinner (oops!), while playing tag with the kids, or even from a nail that sticks out of a fence. No matter how they arise, it’s vital to remember that you can typically take care of these injuries at home.
The first thing you should do when you have a small wound is clean it up. You wouldn’t ask friends over for supper without cleaning up the house first, would you? In the same way, your skin needs to be clean before any healing can start. To get rid of dirt and bacteria, gently rinse the area with lukewarm water. Don’t worry if you see any small pieces of gravel or grass caught in there. Using a pair of sanitized tweezers will help you get rid of those unwanted guests.
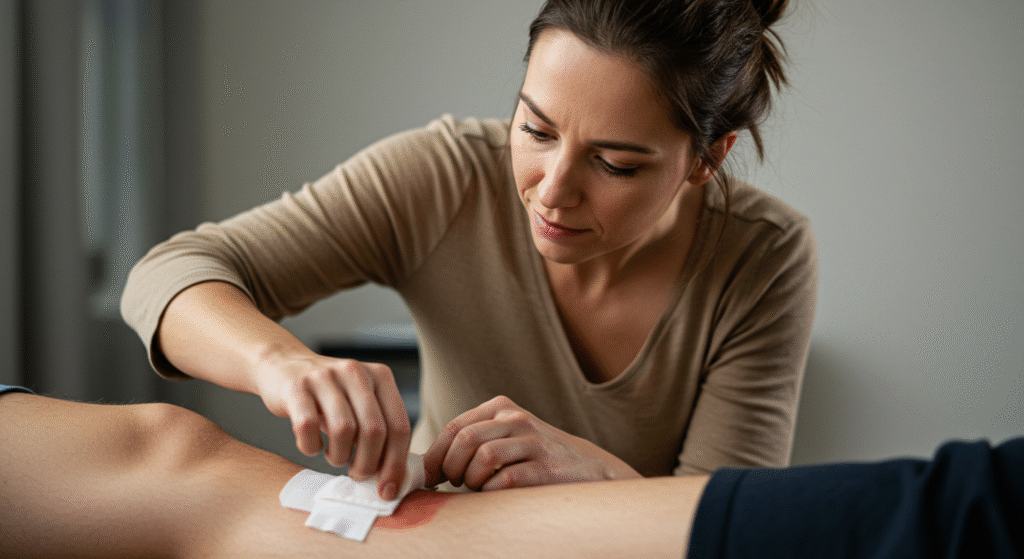
After you’ve washed your wound well, use a soft towel or gauze pad to dry it off gently. Think of this like giving your hurt a warm towel after its bath. Instead of rubbing, patting helps keep the area from getting more irritated. It’s not trying to win any beauty contests; it’s just trying to heal.
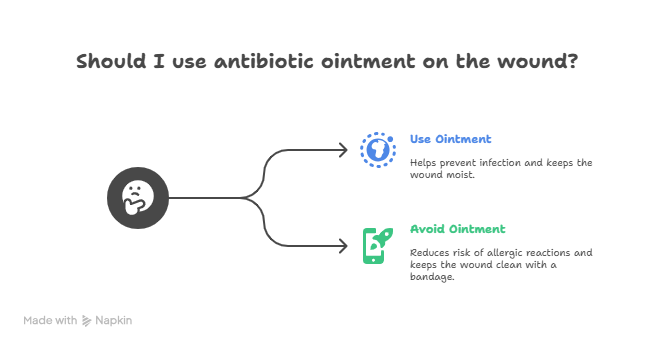
Now it’s time to put on antiseptic, which is one of my favorite parts. It’s like putting on sunscreen before going outside. It’s a must-have layer of protection against bad bacteria. You can buy a lot of things over the counter. Hydrogen peroxide works wonderfully, although it could sting like crazy (yikes!). I like Neosporin better since it not only fights off infection, but it also helps wounds heal faster by making the area around them better for healing.
It’s very important to cover up a wound with a sterile bandage after putting antibiotic on it. It protects you from filth and bacteria while letting your body’s natural healing processes work their magic below. Think about how superheroes always wear capes. They need protection too!
But hold on! You can’t just forget about the wound because you dressed it. During the rehabilitation phase, it’s very vital to keep an eye on your injury. To keep everything clean and dry, change the bandage often, especially if it gets dirty or damp. If you notice that anything isn’t quite right, such a lot more swelling than normal or fluids leaking out, you should probably go to someone who knows about medicine.
That’s all there is to it! You can handle these annoying little problems without getting cold sweats at the notion of going to the doctor’s office if you just follow a few basic procedures to clean, protect, and keep an eye on your tiny cuts and scrapes at home. Keep your first-aid kit filled and ready for action at all times, because every superhero needs their faithful companion!
Cleaning the Wound
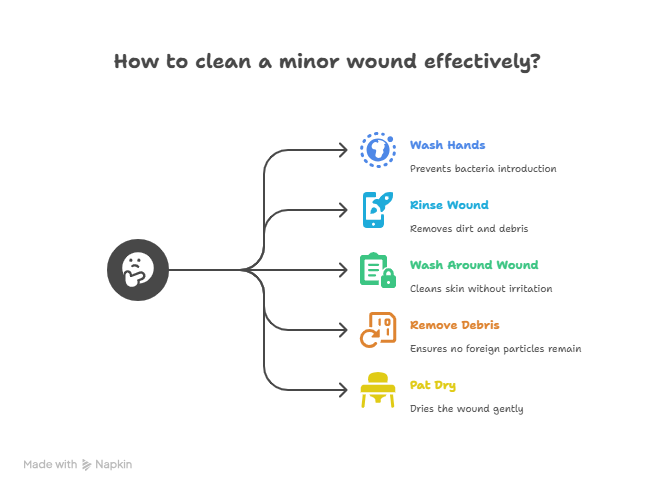
Now that you’ve looked at your combat wound, the first thing you need to do is clean it up. You wouldn’t want dirt from your picnic in the backyard to get comfortable in that new cut, would you? First, wash your hands well, because you never know what germs might be around! Then, with lukewarm water, carefully clean the region that was hurt.
If you see any trash stuck in there, such pieces of grass or those annoying splinters, you need to carefully remove them with tweezers (the ones that have been cleaned). I mean, who wants a keepsake from their previous trip that could make them sick? This isn’t an archaeological excavation, so don’t look around too much. We’re not looking for old things; we just want to get rid of things that don’t belong.
Think of tweezers as your dependable sidekick in the fight against filth and germs. Get a pair with a fine tip so you can be as careful as a surgeon doing a normal procedure. Before you start, clean those tweezers well with rubbing alcohol or hot water. This will make sure they’re ready to go without taking any uninvited guests along.
Once you have your clean tweezers ready, carefully pick up the offending bit of trash. If it’s a splinter, pull it out the same way it came in. No need to do big spins and twists! If you can’t get rid of some really tough dirt or plant stuff, don’t force it. Instead, think about soaking the area in warm, soapy water for a few minutes beforehand. Sometimes all it takes is a little mild coaxing.
After you’ve gotten rid of any intruders from your wound, take a moment to admire your accomplishment before continuing on. You should now pat the area dry with a soft towel or gauze. It should look clean and neat, like my kitchen does after I’ve cleaned it. Believe me, this step is really important to keep from becoming sick. Would you leave damp clothes lying around? Not a chance! Moisture can make a perfect place for bacteria to grow, which is the last thing we want.
To avoid making the skin more irritated, it’s important to pat instead of rub. Be careful! Think of it as a short spa day for your injury. It’s been through a lot already. You’re almost healed once it dries!
To sum up, keeping things clean entails carefully picking up trash and making sure everything stays dry after that. It may sound boring right now, but believe me when I say that these tiny measures can keep you from having worse difficulties later on, including infections that need more than just some ointment and band-aids! So, be like a doctor and give those little cuts and scrapes the care they need. They need someone who knows how vital it is to take care of them properly!
Applying Antiseptic
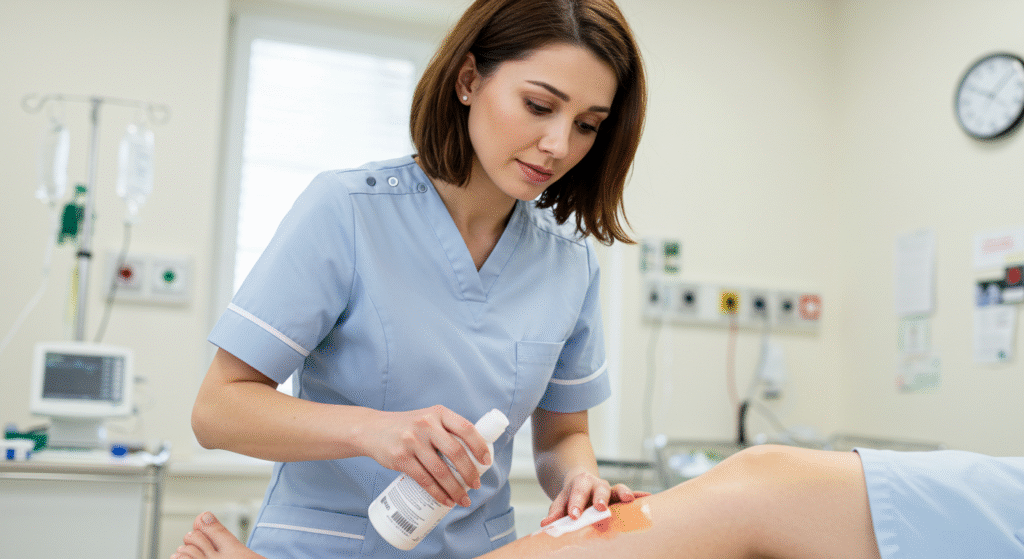
Applying antiseptic is my favorite part after cleaning. This miraculous potion gets rid of any germs that are still on your skin. You can use things you can get without a prescription, like hydrogen peroxide or alcohol wipes, but I like Neosporin because it also helps things recover.
When you use antiseptic, be careful not to use too much. Think of it as putting icing on a cupcake instead of painting a canvas. No one wants a mushy mess when all they need is a thin layer to perform the job. Keep in mind that too much antiseptic might make the skin hurt and slow down healing. Only use enough to coat the area lightly. You don’t want your cut or scrape to feel like it’s becoming buried under a huge pile of snow.
You’re ready for the following step once you’ve put on the right amount of antiseptic, which should be a lovely little shine over the wound. Putting a clean bandage or adhesive strip over the wound is like putting the last touch on your work of art. Not only does this keep it from getting hurt again, but it also keeps dirt and bacteria out that could cause problems later. Your bandage is like a superhero cape for your injury. It protects it from danger while it heals.
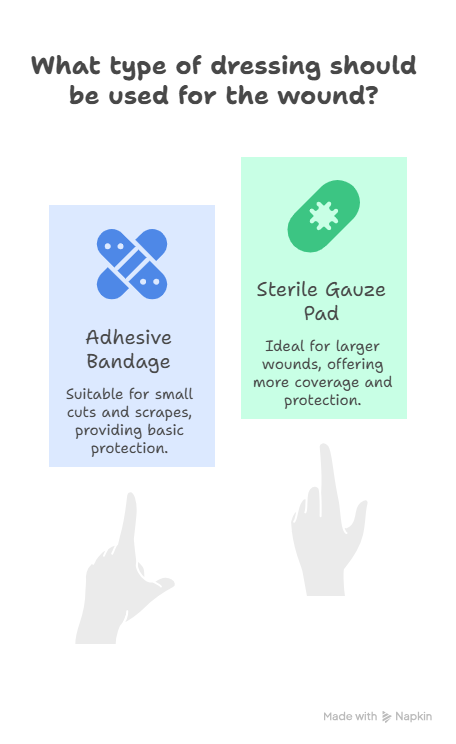
Now, let’s speak about how to pick the best bandage. There are a lot of choices! A simple adhesive strip can work just fine if you have a little scrape. But if your cut is bigger or needs more padding (because who hasn’t banged into something sharp at least once?), you might want to use one of those cushioned pads that are made for more serious injuries. They are thicker and can take more of a hit, like when you wear comfortable shoes instead of flip-flops when you go out for an adventure.
When you put on your bandage, make sure it covers the whole region where you cleaned and treated your wound. You don’t want any sneaky germs to get in through gaps! Press down lightly around the sides to make sure it’s sealed well, but don’t press too hard; we don’t want to flatten our cupcake!
Keeping the wound covered has other benefits as well; it keeps the moisture in, which can help it recover faster. Having protection is important, but you should also check on your wound often. If you see any signs of infection, such as more redness, swelling, or pus, it might be time to see a doctor.
So, there you have it: put antiseptic on delicately, like icing on a cake, and then cover it with a bandage that fits like a champion! This easy procedure can make a big difference in making sure that small cuts and scratches heal fast and well, without turning into something worse later on. We all want our skin to be in great form again so we can keep living our lives without worrying about annoying ailments that slow us down!
Keeping It Covered
So now your cut or scrape is all clean and made up like it’s ready for a night out, but hold on! How long do you need to keep the bandage on? If you can, I think it’s a good idea to keep it covered for at least 24 hours. This provides your body time to start mending without anything getting in the way.
But, and there’s always a “but,” if the bandage gets wet or soiled during this period, you need to change it right away! That damp or dirty bandage is like an invitation for bacteria to host their own party in there. Not cool at all! You wouldn’t want people who weren’t invited to your party, would you? Bacteria love wet places, and they’ll start to grow there faster than you can say “infection.” So, if your bandage is wet or dirty, don’t wait; it’s time to change it!
When you’re ready to change that old bandage for a new one, don’t forget how important it is to be clean. First things first: wash your hands again! It’s like putting on your superhero gloves before you face the next battle. Believe me, it’s really important to have clean hands. You don’t want to add extra germs to the mix when you’re attempting to keep things clean.
Next, you need to look at the wound itself. Take a minute to clean it gently with mild soap and water if it looks like it needs some extra care, such if it seems to have some muck on it or is a little redder than before. This is when you need to act like a nurse and take care of that damage. Take it easy; we’re not cleaning floors here! Just dab away any dirt without making it worse.
You can put on another tiny layer of antiseptic after you clean. Do you remember what we said about frosting before? Well, we need to keep that cake safe and tasty! We don’t want our antiseptic to turn into a big blob again, so just a gentle touch will do. Just enough to cover the area will do a great job of keeping bad germs away.
Once everything is ready, it’s time to re-bandage like a pro! Get a new, clean bandage or adhesive strip and carefully put it over the region that has been cleaned. Make sure it’s snug but not too tight. Think of it as giving your wound a soft hug instead than squeezing it like a pair of clothes that are too tight after Thanksgiving feast.
And here’s a tip: if the adhesive strips you use tend to stick too much (we’ve all been there), try putting some gauze that doesn’t stick between the wound and the sticky section. This helps keep you from having to tear the dressing off again, which would hurt.
Lastly, watch that freshly treated wound over the following few days. Look for indications of infection again, such redness, swelling, or warmth. If you find anything strange, you should be concerned and maybe even go visit someone who knows what they’re doing.
By paying attention and following these instructions every time you need to change a bandage, you can help make sure that small cuts and scrapes heal quickly and without any problems that come up out of nowhere! And let’s be honest: no one wants those annoying small injuries to get worse later because we didn’t take care of them when we should have. So keep being proactive; it will pay off big time!
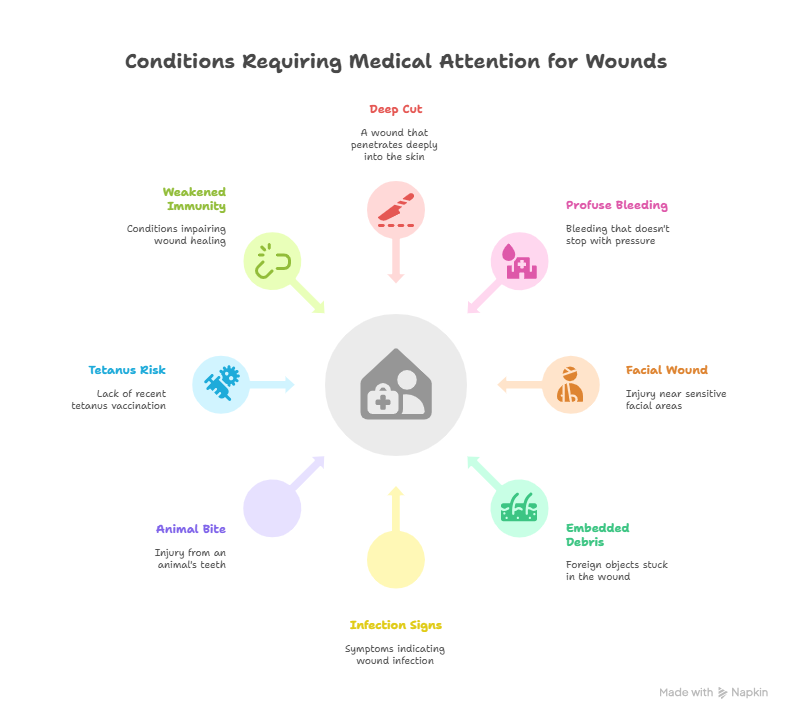
Knowing When to Seek Help
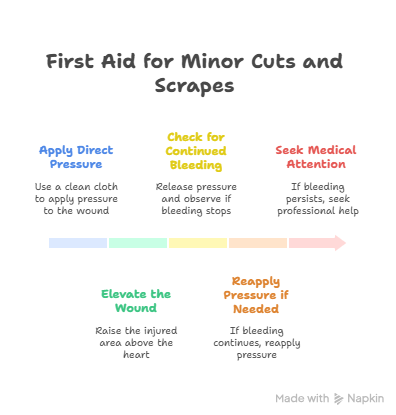
Most of the time, you can take care of little cuts and scrapes at home, but sometimes they need expert help. For example, if they won’t stop bleeding after 10 minutes of direct pressure or look suspiciously deep (hello stitches!), you should see a doctor. If the area around the incision is swollen more than normal or there are signs of infection like redness spreading from the wound or pus seeping out like in a horror movie, you should absolutely see a doctor right once!
I remember once not following my own advise when I felt I could tough out an infected scrape from riding my bike too quickly down our street. You know how it is: one minute you’re flying down the street like a champ, feeling like you can’t be stopped, and the next, you fall and hurt more than just your ego. Spoiler alert: I got antibiotics after days of pain since I didn’t listen to my body when it told me something was wrong!
It looked like just another small cut at first, so there was no need to panic. A quick rinse under some water and a bandage that I put on quickly made me feel like I had everything under control. But as the days went by, that little scrape turned into something that looked like a special effect from a horror movie. It started to itch like crazy, and the redness was so bad that it appeared like a traffic light that had gone insane!
To be honest, I should have known better. My body was flashing me loud and unmistakable signs that something was wrong. But I was being stubborn and thought I could manage it by myself. Maybe it was pride or maybe it was just being lazy. I all, who wants to say they need help with a scraped knee? I chose to disregard those warning flags instead of doing something about them right away.
It’s kind of weird how we can convince ourselves we’re tougher than we really are when we look back on it now. You’d think I would have learned my lesson with all the cuts and bruises I got as a kid, but no! This episode of “Ignoring My Own Advice” finally made me wake up and smell the antiseptic. After days of pain and nights of tossing and turning to avoid hitting my leg on anything, I knew it was time to stop.
After a lot of thinking, I finally went to the doctor. When they saw my bad limb, they raised an eyebrow in amazement. “Did you really wait this long?” The shame hit me faster than any medication could work! It turns out that the infection needed more than simply time; it needed some strong medicine to get better.
So here’s the lesson: it’s very important to pay attention to your body! Don’t be hesitant to get help sooner rather than later if something doesn’t seem right, even if it’s just a small cut or scrape. You will be glad you did this later when you don’t have to deal with extra discomfort or problems.
Remember this story of caution the next time you find yourself in a similar circumstance, or if you witness someone else going through a small calamity. You might even laugh at my expense. Taking care of those small injuries straight away can save you a lot of trouble later on—and maybe even keep you from having to take antibiotics!
Fun Facts About Healing
Did you know that our bodies are really good at healing? Minor cuts can take anywhere from three days to two weeks to heal, depending on things like their size and where they are. Age is also an important aspect! Younger people frequently recover faster than older people, partly because our skin heals more slowly over time.
Also, and this is interesting, a research discovered that keeping wounds moist may help speed up healing compared to letting them dry out completely (who knew?). So keep in mind that moisture is important, but don’t go wild spraying water right on fresh wounds!
Suggested Resources:
How To Treat Minor Cuts and Scrapes
https://www.mayoclinic.org/healthy-lifestyle/adult-health/in-depth/cuts-and-scrapes/art-20046043
Basic First Aid Steps
https://www.redcross.org/get-help/how-to-prepare-for-emergencies/first-aid.html
Wound Care Instructions
https://www.healthline.com/health/wound-care

Kevin Collier is a seasoned health writer at Otchut.com, specializing in over-the-counter medicines, common medical ailments, and general health topics. With a background in healthcare and a passion for making medical information accessible, Kevin aims to empower readers with knowledge to make informed health decisions. When he’s not writing, he enjoys researching the latest in health trends and advocating for wellness in his community.


